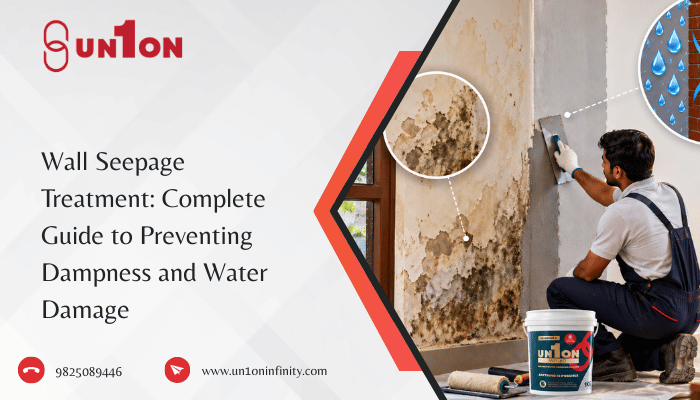
Wall seepage is a common problem in Indian homes and buildings, especially during the monsoon season. Water can enter walls through cracks, leaking pipes, damaged exterior surfaces, roofs, balconies, or poorly sealed joints. If ignored, seepage can lead to damp patches, peeling paint, mould growth, unpleasant odours, and long-term damage to the wall structure.
The right treatment depends on identifying the actual source of moisture and selecting a suitable waterproofing method. This guide explains the causes, early signs, treatment methods, application process, and prevention tips for dealing with wall seepage.
What Is Wall Seepage and Why Does It Happen?
Wall seepage occurs when water or moisture enters and remains inside a wall instead of being properly drained away. The moisture may come from rainwater, plumbing leaks, bathrooms, terraces, balconies, or moisture moving through cracks and porous construction materials.
Walls can absorb water because materials such as concrete, brick, mortar, and plaster contain small pores. When these surfaces are exposed to continuous moisture, water can gradually move through the wall.
Common signs include:
- Damp or wet patches
- Peeling paint
- Blistering or bubbling paint
- Black or green mould
- White powdery deposits
- Cracks and damaged plaster
- Musty smell
- Discolouration around corners and windows
Finding and fixing the source early can prevent more expensive repairs later.
Common Causes of Wall Seepage
Several issues can cause moisture to enter a wall. Identifying the source is the first step toward choosing the correct solution.
| Cause | How It Leads to Seepage |
| Rainwater | Water enters through cracks and exposed exterior surfaces |
| Plumbing leaks | Damaged pipes allow water to enter walls |
| Roof leakage | Water travels from the roof into adjoining walls |
| Bathroom moisture | Water can pass through poorly waterproofed bathroom areas |
| Balcony leakage | Damaged flooring or joints allow rainwater to penetrate |
| Wall cracks | Cracks provide direct paths for water |
| Poor drainage | Water remains near walls and gradually penetrates the surface |
| Damaged waterproofing | Old or failed waterproofing allows moisture to enter |
In some cases, more than one problem may be responsible. Therefore, simply repainting a damp wall may not provide a permanent solution.
How to Identify Wall Seepage Early
Early identification makes treatment easier and can reduce repair costs. Regularly inspect walls, particularly before and after the monsoon.
Look for:
- New damp spots
- Paint that is peeling or becoming loose
- Discoloured areas
- Fine cracks around windows and doors
- Moisture near plumbing lines
- Mould or fungal growth
- White salt-like deposits
- Dampness that increases after rainfall
Pay attention to whether the affected area is on an interior or exterior wall. The location can provide useful clues about where the water is coming from.
Effective Wall Seepage Treatment Methods
The appropriate treatment depends on the source, severity, wall condition, and location of the seepage.
1. Repair Cracks
Small cracks should be cleaned and properly repaired using a suitable crack-filling or repair material. Larger structural cracks may require professional inspection.
2. Fix Plumbing Leaks
If seepage is caused by a leaking pipe, waterproofing the surface alone will not solve the problem. The damaged plumbing should first be repaired.
3. Treat Exterior Walls
Exterior walls exposed to rain require a suitable waterproofing system. Surface preparation followed by an appropriate protective coating can help reduce water penetration.
4. Waterproof Roofs and Balconies
When moisture is entering through a terrace, balcony, or roof, the source should be waterproofed before treating the affected interior wall.
5. Repair Damaged Plaster
Severely damaged or loose plaster should be removed and repaired after the moisture source has been controlled.
6. Use a Suitable Waterproofing Coating
A compatible coating can provide an additional protective barrier against moisture. The product should be selected according to the wall material and exposure conditions.
How Does a Wall Waterproof Coating Help?
A wall waterproof coating creates a protective layer over the surface that helps reduce the penetration of rainwater and moisture. Depending on the product, it may also provide flexibility, adhesion, weather resistance, and protection against surface deterioration.
A good coating system can be useful for exterior walls that are regularly exposed to rain and humidity.
However, coating should not be treated as a substitute for repairing major cracks, leaking pipes, damaged roofs, or defective drainage. The moisture source should be addressed first.
Benefits of Waterproof Coating
- Helps reduce water penetration
- Protects exposed wall surfaces
- Can improve resistance to rain and humidity
- Helps protect the underlying surface
- Can improve the durability of exterior finishes
- Provides an additional layer of protection after repairs
How to Apply Waterproof Coating to a Wall
Proper application is important for achieving reliable results. The general process includes the following steps:
Step 1: Inspect the Wall
Identify cracks, damp patches, damaged plaster, and possible sources of moisture.
Step 2: Fix the Source
Repair leaking pipes, roof problems, drainage issues, cracks, or other causes before coating.
Step 3: Clean the Surface
Remove dust, loose paint, dirt, mould, and weak material. The surface should be suitable for coating.
Step 4: Repair Damaged Areas
Fill cracks and repair damaged plaster where required.
Step 5: Apply Primer if Required
Some coating systems require a compatible primer to improve adhesion and surface performance.
Step 6: Apply the Coating
Apply the recommended number of coats according to the product instructions. Ensure proper coverage and avoid leaving untreated gaps.
Step 7: Allow Proper Curing
Give each coat sufficient drying or curing time before applying the next layer or exposing the surface to moisture.
Step 8: Inspect the Finished Surface
Check for missed areas, uneven application, cracks, or other visible defects.
Wall Seepage Treatment for Interior vs. Exterior Walls
Interior and exterior walls require different approaches because they experience different moisture conditions.
| Factor | Interior Walls | Exterior Walls |
| Main moisture sources | Plumbing, bathrooms, adjoining walls | Rain, humidity, cracks |
| First priority | Find internal moisture source | Check external water entry |
| Surface condition | Paint and plaster often affected | Paint, plaster and masonry exposed |
| Treatment focus | Source repair and internal restoration | Exterior protection and water resistance |
| Maintenance | Check plumbing and damp areas | Inspect after monsoon and heavy rainfall |
For interior walls, simply applying a coating over an active damp area may trap moisture and cause the problem to return. Exterior walls generally require greater attention to weather exposure and rainwater penetration.
Common Mistakes to Avoid When Treating Wall Seepage
Avoid these common mistakes:
- Painting over damp walls without fixing the source
- Applying waterproofing over loose or dirty surfaces
- Ignoring cracks
- Treating only the visible damp patch
- Using an unsuitable coating for the surface
- Applying fewer coats than recommended
- Not allowing sufficient drying or curing time
- Ignoring plumbing leaks
- Neglecting roof and balcony waterproofing
- Failing to inspect the wall after the monsoon
The most important rule is to treat the cause of seepage, not just its visible symptoms.
How to Prevent Wall Seepage in the Future
Regular maintenance can significantly reduce the risk of recurring dampness.
Maintain Exterior Walls
Inspect exterior surfaces for cracks, damaged paint, open joints, and areas where rainwater may enter.
Keep Gutters and Drainage Clear
Blocked drains can cause water to accumulate near walls and foundations.
Check Plumbing Regularly
Small plumbing leaks can gradually create significant dampness. Check concealed and exposed plumbing areas for signs of leakage.
Maintain Roofs and Balconies
Inspect waterproofing systems, floor joints, drainage outlets, and cracks before the monsoon.
Seal Cracks Early
Small cracks should be addressed before they become larger pathways for water.
Recoat When Necessary
Exterior protective coatings may require maintenance or recoating depending on product life, weather exposure, and surface condition.
FAQs About Wall Seepage Treatment
What is the main cause of wall seepage?
Common causes include rainwater penetration, plumbing leaks, roof leakage, bathroom moisture, cracks, poor drainage, and damaged waterproofing.
Can seepage be fixed by repainting the wall?
Repainting alone usually does not solve the underlying problem. The moisture source should be identified and repaired before repainting.
Is waterproof coating suitable for exterior walls?
Yes, suitable waterproof coatings can help protect exterior walls from rain and moisture. The coating should be selected according to the surface and exposure conditions.
How can I stop seepage during the monsoon?
First identify where the water is entering. Check exterior walls, roofs, balconies, plumbing, drainage, and cracks. Repair the source and then apply an appropriate waterproofing system.
Should damp plaster be removed?
If plaster has become loose, damaged, or weakened because of prolonged moisture, it may need to be removed and repaired after controlling the water source.
Can wall seepage return after treatment?
Yes. Seepage can return if the original source of moisture is not properly repaired, if the coating system is unsuitable, or if the surface was not correctly prepared.
Conclusion
Wall seepage should be addressed as soon as the first signs of dampness, peeling paint, mould, or discolouration appear. The most effective approach is to identify the source of water, repair cracks or leaks, prepare the affected surface properly, and use a suitable waterproofing system.
For long-term protection, regular inspection of exterior walls, roofs, balconies, plumbing, and drainage systems is essential. Proper surface preparation and application also play an important role in preventing recurring water damage.